
Several years ago I decided to try to design my own quilt. I found the entire process very frustrating because I didn't know where to begin. I'm posting the entire design process in the hope that it will inspire other beginners to design their own quilts. It's so rewarding to see a design that was translated onto paper actually come to life as a quilt.
The first thing that I always do is to develop a quilt plan. The plan includes a sketch of the design, the size, number of blocks per row, block size and colors. I really like the cat from Whistlepig Productions Wild Cat pattern and decided to use it for my cat blocks. I selected the medium cat and changed the colors to black and white. Heidi used red accents in her living room and I wanted the quilt to coordinate with red. I used a color wheel (available at craft and fabric stores) to determine compatible colors. When I went to purchase the fabric I decided to do a monochromatic theme.
 Quilt plan, color wheel and sample color swatches
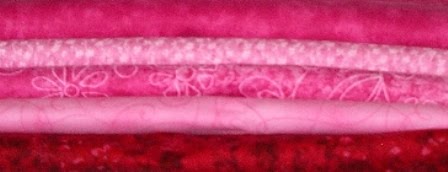 Quilt fabrics
The next step is to pre-wash and iron all of the fabrics. DO NOT SKIP THIS STEP! Quilt fabric is 100 % cotton and must be pre-shrunk, otherwise the quilt will shrink when it's washed for the first time.
Directions for Cat Quilt:
All fabrics used in this quilt are 45 inches wide.
Finished size is 56 x 72.
5 yards red fabric (45 inch wide) for backing, borders and binding
1/2 yard white fabric for cat's muzzle and paws
1/2 yard black fabric for the cat and the ears
1 yard dark pink dotted fabric for the border
1 1/2 yards each of light pink and medium pink fabrics (2 light pink prints, 1 medium pink print) The light pink prints are for the background squares and the medium pink print is for the hearts.
2 yards deep rose fabric for borders and sashing
scraps of light pink print for the cat's nose and inner ears
Heat and Bond for appliques (Do Not use Heat and Bond Ultra. It's very difficult to sew through.)
Threads: Natural color machine quilting, black and medium pink
Green beads for the cat's eyes ( I used Green Jasper)
Twin size low loft batting ( I chose low loft because the finished quilt would pack flat for mailing.)
Whistlepig Creek Productions Wild Cats pattern for the cat (available from www.wpcreek.com)
Cricut George cartridge for the hearts
All seams are 1/4 inch. Press each seam. This will allow the quilt to lay flat making it easier to sew and give more professional looking results.
1. Trace the cat image from the pattern on to the Heat and Bond (paper side facing up). Trace the cat in pieces (face, ears, paws, nose and cat body). Draw 24 cats and carefully cut them out. Lay the fabric wrong side up on the ironing board, lay the Heat and Bond paper side up on top of the fabric and fuse according to manufacturer's directions. Fuse the cat body and ears on the black fabric, the muzzle and paws on the white fabric and the inner ears and nose on the pink fabric.
2. Cut the medium pink print fabric and Heat and Bond to fit the Cricut cutting mat (mine is 6 x 12). Lay the fabric with the wrong side facing up on the ironing board and lay the Heat and Bond paper side up on top of the fabric and fuse. Place the fused fabric on the cutting mat (fabric against the mat and paper side up). Press down hard to get the fabric to stick to the mat. Tape the edges down with painter's tape, otherwise the fabric will shift when the blade starts to cut. Using the George cartridge select the heart and set the dial to 5 1/2 inches. Cut out a total of 24 hearts.
3. Cut 24 eight inch square blocks out of each of the light pink print fabrics (total of 48 blocks).
4. Remove the paper backing from the hearts, center on the block and fuse. Center the cat body on the block, fuse and then add each of the pieces and fuse (ears, nose, paws). Check the pattern for placement markings for each piece. Finish the fused pieces using a zig zag stitch. Use black thread around the cats and pink thread around the hearts. Using the zig zag stitch sew the cat's eyebrows and whiskers. Using black thread sew the eyes on by hand using green beads (I used green Jasper beads).
5. Using the dark rose fabric cut about ten 2 inch strips for sashing between blocks.
6. Assemble the rows alternating cats and hearts. Each row contains 6 blocks. Example: Row 1 Cat, Heart, Cat, Heart, Cat, Heart Row 2 Heart, Cat, Heart, Cat, Heart, Cat Sew the sashing to the blocks using 1/4 seams. Do not sew sashing to the end blocks. Each row will use 5 pieces of sashing. Press seams toward the blocks.
7. Sew the sashing between the rows. You should have a total of eight rows. Do Not sew sashing to the top or bottom. Press seams.
8. Using the dark rose fabric cut eight 2 1/2 inch wide strips to make the borders. Sew two strips together. Press. Sew the strips along the sides of the blocks. Press and then sew the strips along the top and bottom rows. Press.
9. Cut eight 1 1/2 inch wide strips out of the red fabric. Sew two strips together and then press. Sew the strips to the side borders and then the top borders. Press seams.
10. Cut ten 2 1/2 inch strips out of the dark pink dotted fabric. Sew two strips together and repeat. Then sew three strips together and repeat. Sew the three strip unit to each side of the quilt and the 2 strip units to the top and bottom of the quilt.
11. Take the 4 yards of the red fabric and fold the fabric crosswise. Double check your measurements by laying the fabric on top of the quilt. Cut the fabric in half (2 yard pieces) and sew together. This will form the backing for the quilt. Press seams. Lay the backing wrong side facing up on a large table or the floor, lay the batting on top of the red fabric and then lay the quilt top on the batting. You want to form a sandwich- backing, batting, quilt top. Baste the layers together using quilters safety pins. The batting and backing fabric should extend three inches past the quilt top on all sides. Trim away any excess.
12. Start quilting the layers. Begin in the middle of the quilt and work towards the ends. Stitch around the edges of each block. Next stitch around each heart. This will cause the hearts to puff up slightly. Trim away the excess fabric and batting before sewing on the binding.
13. Cut twelve 1 1/2 inch strips out of the red fabric. Sew 3 strips together. Repeat. Press seams and fold in half and press. Sew strips along the sides and the top and bottom of the quilt. Press. Pin in place and then stitch by hand.