Wednesday, July 29, 2015

Laurel Burch Cats Update

I have been busy stitching my Laurel Burch Cats.  The Feathered Friends has only a little back stitching left and then it can be framed.  I am almost finished the Feline Friends design.  I really like how the pieces turned out.  Even better, they were quick to stitch.  Only two weeks start to finish.  No I am not one of those ladies with nothing better to do than cross stitch.  I am constantly busy, leaving only a couple hours at the most, each evening to cross stitch. 

Feathered Friends


Feline Friends-almost finished!

Recently I pre-ordered Creative Girl Mixed Media Techniques For An Artful Life by Danielle Donaldson, from Amazon.  I was really unsure about ordering this book since Amazon had not posted a preview of the book.  I really like Danielle Donaldson's watercolors and was hoping for a book where she would share her techniques.  The entire book is based on her techniques and is set up on a project by project basis. Naturally I just had to create something using her approach to mixed media.  Watercolor is the foundation of the project and then paints, gel pens, markers and other mixed media elements are added to enhance the painting.

Just Thinking
Just Thinking is a journal entry that will probably never see the light of day.  May be it will end up in a finished piece, who knows?  Danielle Donaldson uses white space to highlight her paintings while I covered every inch of the paper with color.  Gel pens and black Sharpie were used to make the doodles in the background.  Everyone can use this book.  The instructions are easy to follow and the designs are simple and easy to draw.  If you can draw basic shapes you can easily draw a Creative Girl inspired figure.

A Hibiscus By Any Other Name

Lately I have devoted so much time and effort to maintaining the gardens, but it has paid off.  They are beautiful!  Everyone who visits our home always wants to visit the gardens.  My son-in-law has described it as "a beautiful retreat."  He really liked the perennial Hibiscus. He always liked Hibiscus but didn't like the fact that they were annuals in our part of the country. Brandon recently planted the perennial Hibiscus in his gardens and they are thriving.

As I acquired four more Rose of Sharon bushes, also a Hibiscus, the cashier at the garden center saw Hibiscus on the plant tag and said that she thought that these were Rose of Sharon and not Hibiscus.  I started thinking that a lot of people might not know the difference in the plants.  Since my gardens have all three types, I thought that a post might be helpful.

The Rose of Sharon, while technically a Hibiscus, is a flowering shrub.  It blooms continuously from the end of May until the first frost.  It is a perennial and has been quite hardy.  At my house, they have endured hurricane force winds, very cold winters and long hot summers. The White Chiffon is planted close to the house so I placed a trellis behind it to contain its growth.  This plant is growing more upright and has not spread as much as the violet one. Rose of Sharon is one of my favorite plants because it provides a lot of flowers without a lot of maintenance.

Five Year Old Rose of Sharon Bush

Rose of Sharon
White Chiffon Rose of Sharon

The tropical Hibiscus are so beautiful and they come in a variety of colors from the familiar orange to yellow, and a coral pink. The hummingbirds love the nectar.  These plants also like sunny locations and flower all summer long without a lot of maintenance.  However, unless one lives in a tropical location like Florida these plants are annuals.  They cannot tolerate cold temperatures.  I sometimes dig them up before the first frost and plant them in a container and place them indoors over the winter. Then in the spring I transplant them outdoors.

Tropical Hibiscus

Lately the garden centers in my area have been selling perennial Hibiscus.  These plants can withstand the cold winter temperatures.  The plant has larger leaves and larger flowers than the tropical plants.  The hummingbirds also like the nectar of these plants. Unfortunately Japanese Beetles also like the leaves.  I don't spray the plants because the birds like to eat the beetles.

Three year old perennial Hibiscus.

Recently planted perennial Hibiscus.

I hope the pictures and the description of the plants will be helpful.

Monday, July 6, 2015

Mail Art

It's always fun to get a package in the mail.  It's even nicer to receive a brightly decorated package.  The first time that I encountered "mail art" was while leafing through Sommerset Studio magazine.  The editor published some of the creative packaging the magazine received containing art submissions.   At the time, I was sending so many packages to Connecticut that I thought it might be nice for Brittany to see a brightly decorated box on her door step after a long day on campus.  The decorated package was an instant hit, she loved it and so did her neighbors, her room mate and the UPS driver.  I reached for a plain shipping envelope to enclose a small box containing a gift card,  but I couldn't bring myself to place the contents inside this boring envelope.  Maybe it's time to revive mail art.

For the past few nights I had been trying to work art into my busy schedule.  I bought a copy of Dyan Reaverly's  Distictly Dylusional art journaling book, some Dylusions spray inks, stamps and the Dylusions journal and had been working my way through the book.  As I finished up my first entry in this new journal I decided to use the left over stamped flowers in the mail art.

Dylusions Journal Entry

I squirted some light blue DecoArt craft paint on the envelope in several places and spread it out with an old gift card.  Next I added some dark blue, and then purple paint creating a marbled effect as I spread the paint out.  I found a Chat Noir cut out in the "Pandora's Box" of die cuts and decorative elements. I glued the cat and the flowers to the envelope and added a decorative border (with a quote from Shakespeare on the inside of the border) for the address label.  Once the label is attached to the envelope the design area will be covered with clear contact paper to protect it during shipping. Hopefully this decorated package will brighten everyone's day.

Chat Noir Shipping Envelope


Directions for Decorated Shipping Envelope:

8x10 Padded Shipping Envelope
DecoArt light blue, purple and dark blue craft paint
Used GiftCard
Dylusions Flower Stamps
Color Box Chalk Ink-black
Dylusions Acrylic Block
Chat Noir Die Cut- SVG Cuts Maple Manor
Black and yellow card stock
Black Sharpie Marker-regular and fine point
White Gel Pen
Prisma Colored Pencils
Strathmore Bristol Paper
Clear Contact Paper or Shipping Tape


1.  Stamp several sizes of flowers on the Bristol paper using the black ink.

2.  Color the flowers with the colored pencils using colors that will stand out against the blue background.  Carefully cut the white paper away from the flowers petals.

3.  Cut Chat Noir at the given SVG Cuts file dimensions, out of black card stock.  Glue a small scrap of yellow card stock behind the opening for the cat's eyes.

4.  Randomly squirt light blue paint over the surface of the envelope and spread with the gift card.  Squirt dark blue paint over the surface and swirl with the gift card.  Repeat with the purple paint. Set aside to dry.

5.  Glue Chat Noir the left side of the envelope.  Use the journaling block to add a scalloped border the right side of the envelope.  The border should be large enough to attach and address label later.

6.  Add doodles or Zentangles to the inside of the border, with the black Sharpie marker.  Use the white gel pen to highlight to doodles.  Use a fine point black Sharpie to add a quote around the inside of the border.

7.  Glue the flowers randomly around the envelope, leave room for the postage in the upper right.

8.  Outline Chat Noir and the flowers with the white gel pen.  Add the cat's pupils and whiskers with the black Sharpie.

9.  Cover with clear contact paper or shipping to protect the design.

Saturday, June 27, 2015

Laurel Burch Cross Stitch Kits

Wow I can't believe that my last art project was at the end of May!  The past month just flew by, can't believe it's almost July.

 At the end of May we took a vacation to Gatlinburg, Tennessee.  The Smokey Mountains are so beautiful and the atmosphere was very restful.  Gatlinburg has always been known for it's Arts and Crafts community, but sadly this community is starting to dwindle down.  Only the most dedicated artists and crafts people still remain.  We toured the shops and studios of a variety of artists, from a man that did detailed sculptures (of bears and other animals) using a chain saw, jewelry designers, and artists working on canvas paintings (while we looked on and asked questions).  It was nice for me to be able to observe other artists at work and to talk shop, although I'm sure my family was a little bored.  If you are looking for a restful vacation spot, then consider the Smokies.  The blue smokey haze coming off of the mountains in the morning is breathtaking. the scenery in the Smokey Mountain park is beautiful, there's Dollywood in nearby Pigeon Forge and there is great food and the nicest people that I have ever met.  It's been tough acclimating from Smokey Mountain time where everything is at a slower pace and no one rushes about, to the DC area where everything is a constant rush and we are driven by the clock.

With all of the rain that we have had lately, my beautifully maintained flower and vegetable gardens have become a haven for weeds. The thistles have over taken my plants, so I have been dodging the rain and attacking the weeds.  Sadly my department store "Wellingtons" finally gave out and completely fell apart.  I spend so much time in the gardens that I opted for a really good pair of Wellingtons.  I ended up with Hunter boots from England and love them (after all they are good enough for Her Majesty).  I seriously doubt that Her Majesty wears hers for gardening and mowing the lawn.

While I was in Gatlinburg, we drove to nearby Pigeon Forge, where Brittany and I visited the Dixie Darlings Cross Stitch shop.  The shop is large and impressive with lots of floss, silk threads and wool for stitching, and a variety of cloth in various sizes and thread counts.  In addition there are numerous kits and rows and rows of cross stitch patterns.  I ended up buying the hard to find 14 count Aida cloth in the Haunted color for the Headless Horseman cross stitch pattern.  While there I saw some small Laurel Burch kits by Mill Hill.  I love Laurel Burch's cats so this was a must have.  I started the kit while I was in Gatlinburg and am almost finished.  I was able to find one of the companion kits on line so that I can hang them as a pair once finished.

Laurel Burch Feathered Friends


So many interesting art instruction books have recently been published.  I ended up ordering Art At The Speed of Life (Pam Carriker, not a recently published book), Creating Art At The Speed of Life (Pam Carriker), Mixed Media Portraits with Pam Carriker, Drawing and Painting Beautiful Faces (Jane Davenport), and No Excuses Watercolor (Gina Rossi Armfield).  I admit it, books are my downfall!  Most of these books are in workshop format and I decided to work my way through the lessons at my own pace rather than to try to find time to fit classes into my busy schedule. 

At the present, I am working my way through Jane Davenport's book.  This book shows how to create beautiful portraits in Jane Davenport's whimsical style.  The faces lend themselves to use in art journals and mixed media.  Pam Carriker's book focuses on drawing portraits using the face mapping technique. She demonstrates face mapping from a photo.

Thursday, May 21, 2015

Mixed Media Welcome Sign

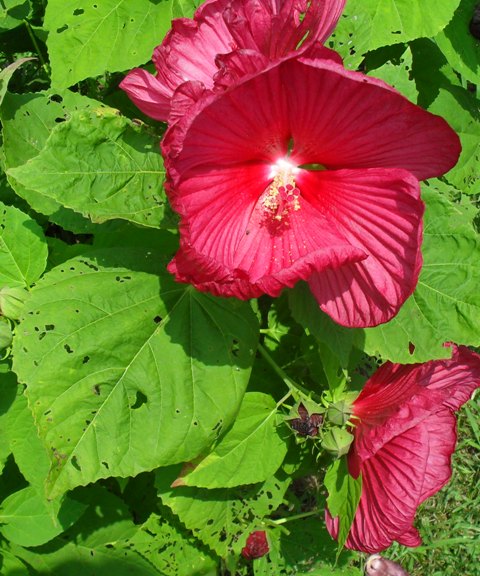
Oh the weather has been so nice!  Warm and lots of sun so naturally I spend as much time outdoors as possible.  The peonies just bloomed.  The Sarah Bernhardt peony had the most beautiful large, pink blooms and then a violent rain storm knocked all of the blooms on the ground.  Oh well it was beautiful for one day, but some good did come from this.  After the rain was over, we had the most beautiful rainbow that I have ever seen.

Lately I have been working on little decorative accents for my house.  The garage is an area that has been overlooked.  It's not an area that anyone in the family ever thought of decorating, until now.  Why shouldn't the garage entrance to the house be inviting?  In an effort to try to give the garage a face lift, I made a welcome sign.  My husband really likes the sign for it's simplicity.  It's for the garage so I didn't want to go over board on embellishments.


This was a quick, easy and inexpensive project.


Directions for Mixed Media Welcome Sign:

Art Minds Clear Pine Craft Wood  5.25 x 12 inches- available at Michaels
Liquitex Acrylic Paint- Payne's Grey, black
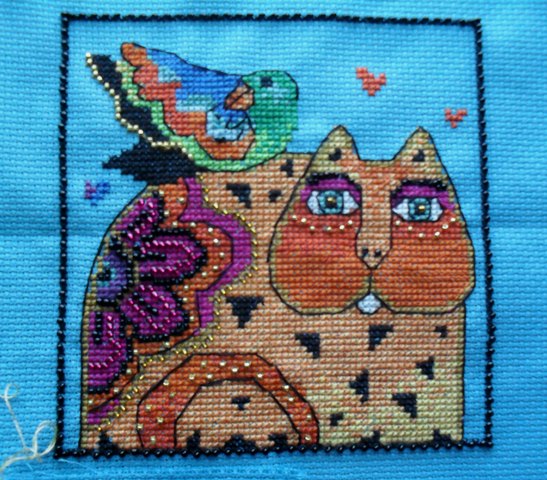
SVG Cuts Maple Manor cutting files-Chat Noir
Gesso
Ranger Ultra Thick Embossing Enamel- Clear
Heat Gun or Ranger Melting Pot
Teflon coated craft tweezers
Golden Crackle Paste
Lavender color flowers
Martha Stewart Leaf Paper Punch
Black Card Stock for Chat Noir and outline
Scrap of olive card stock for leaves and gold for cat's eyes
Sheer Purple ribbon
Vinyl for electronic cutting machines- light purple and black
Computer font or Sketch font from Silhouette Design Store
Hot Glue Gun
Sharpie Marker- black
Tim Holtz Distress Ink-Twig
Craft mat or ceramic tile
Old paint brush

1.  Cut Chat Noir and outline out of black card stock to dimensions given in cutting file.  Glue the cat to the outline and then glue a scrap of gold card stock under the image for the eyes.

2.  Melt the UTEE in the Ranger melting pot and use tweezers to dip the cat until the entire image is coated. Set aside on the non stick craft mat to harden and dry.  If using the heat gun to melt the UTEE, place the cat on the craft mat.  Spread UTEE evenly over the cat and heat until the UTEE has melted.  Set aside to harden.

3.  Coat the wooden sign with gesso on both sides and let it dry.  Coat the the entire piece with Payne's Grey, let it dry and add a second coat of paint.

4.  After the paint has dried, apply a smooth coat of crackle paste with an old gift card.  Set aside to dry overnight.  Don't try to rush the drying with a heat gun, the crackle pattern will be more noticeable with air drying.

 5.  Once the piece is completely dry,  apply a thin coat of black paint with a foam brush and wipe off with a soft cloth or paper towel, until the only black paint that remains is in the cracks.

6.  Using a font from your computer or a purchased font, cut Welcome out of black vinyl, to fit the center of the sign.  I used the Silhouette Design Store Sketch font and cut it at 7.25 inches long.  Use the offset option to make an outline of Welcome and cut it at the same dimensions as the black lettering, out of light purple vinyl.

7.  Adhere the purple Welcome outline to the center of the sign and place the black lettering over the outline.

8.  Glue Chat Noir to the left side of the sign, letting his tail hang below the bottom edge of the sign. 

9.  Glue flowers around the right side of the sign and next to Chat Noir.  Punch leaves and glue under the edges of the flowers.  I used seven leaves but you can use more or less.

10.  Place a few drops of the distress ink on a craft mat and dip the tip of the paint brush handle in the ink.  Dot the ink randomly over the sign.  Picking up additional ink from the craft mat when necessary.

11.   Glue a piece of sheer purple ribbon behind the top edges of the sign to make a hanger.  Cut two pieces of ribbon large enough to tie small bows. Glue the bows to the top front edge of the sign.

Wednesday, May 13, 2015

Mixed-Media Journal

Art journaling has never been my strong point.  Journals are as important to artists as they are to writers. It's a place to experiment with new products and work out ideas.  Sometimes an idea works out and sometimes it doesn't, but that is part of the learning process.

 I really like the idea of keeping an art journal but I'm intimidated by it.  Recently I joined the Documented Life Project  group.  The other members of the group are very talented and creative and their journals are beautiful.  One member of our group had her work published recently in Somerset Studio magazine. Each month we have a theme.  April's theme was Color Safari, exploring inks and paints.  Dyann Reaverley was the guest artist. It was fun learning how to use the new Dylusions paints and inks and I enjoyed fun working with such a creative group of women who are encouraging and inspiring.

Here are some of my Color Safari projects using Dylusions paints and ink.  This background page was a lot of fun and used very little paint.  The Dylusions paint by Ranger is one of my favorite journaling products.  It's thin, goes on smoothly, doesn't soak through the page and dries quickly.  It's a definite improvement over the heavier acrylic paints. To achieve this background I applied orange Dylusions to the paper in a circular motion (with Ranger Foam Blending Tool), next turquoise was added around the edges, followed by grass green and then purple was blended over the entire page.  When using Dylusions, a little goes a long way. Always dip the foam blending tool in the paint lid (not directly in the paint) and swirl the paint around on a non stick craft mat (I used a small white glazed tile from Home Depot) to blend it, then apply the paint to the paper. Keep adding light layers of paint until you achieve the desired color.


These next photos are journal pages using Dylusions paints and inks.

Annabelle Lee

The background of this page was made using turquoise and purple paint.  The background was layered using Stencil Girl's Square Dance (circles in squares) 6x6 stencil and applying Tim Holtz Vintage Photo distress ink to the stencil.  The page was misted with water.  Once the page had dried, Stencil Girl's Talia the Rain Goddess was centered on the page and Viva purple metallic embossing paste was applied over the stencil with a palette knife.  Remove the stencil from the page and soak in water immediately to remove the modeling paste.  Let the page air dry over night.  Once the page is dry, outline the circles in the background with a black Sharpie marker.  Outline the black circle with Dina Wakely Heavy Body Acrylic paint- Penny and a fine tip applicator to fit the paint tube (this is available from Ranger).  Make a circle in the middle of the large circle, using the Penny colored paint.  After the page is dry add the quote of your choice.

 I was reading Edgar Allen Poe's poems while waiting for this to dry and decided to use a quote from Annabelle Lee.  The eyes of the piece are mesmerizing and Talia turned out beautiful so I chose the line " The stars never rise, but I feel the bright eyes of the beautiful Annabelle Lee."-Edgar Allan Poe.  Annabelle Lee is being copied and framed to hang in my home, without the white gel pen quote.


This bird was created by layering yellow Dylusions paint over the entire page and then adding bright pink and orange around the page.  I used Stencil Girl's Eyes 6x6 stencil and Tim Holtz Vintage Photo distress ink over the stencil.  To cover the entire page, move the stencil around.   Outline the some of the areas of the stencil with white gel pen and other areas with a fine line black Sharpie pen.  Outline black outline with Dina Wakely Turquoise Heavy Body Acrylic paint and let it dry.  Center Stencil Girl's Perched Bird 6x6 stencil on the page and cover with Liquitex Light Modeling Paste.  Let the bird dry.  Once dry, use a Bronze metallic Sharpie marker to draw in a branch and outline the branch with the fine line black Sharpie.  Color the leaves and the bird's eye with the Dina Wakely turquoise paint and make a freehand swirled border around the left side and the top of the page. Let the paint dry. Outline the swirled border with white gel pen.  Use TCW's Doily stencil and white Dylusions paint to add accents around the top and sides of the page.  Once dry, lay the stencil over the white stenciled areas and add bright pink Dylusions paint.  Once the page is completely dry spray with Walnut Ink Java color and then spritz with water until the ink beads up. Blot with a paper towel and repeat.  Gently wipe the ink from around the bird to outline him.

Pearls
Pearls is a tribute to Coco Chanel.  The quote "Pearls will set you free." came from Karen Karbos's book the Gospel According To Coco Chanel.

 While working in the Life Project class, we had sprayed so much water on our pages that the spray ink had soaked through the page.  I was using the Canson Mixed Media journal and the paper was not heavy enough to prevent the ink from saturating the page and bleeding through the back.  I didn't want to waste the page so I used the medium mask from Dylusions Flossie stencil and mask.  After laying the mask on the page, I used Dylusions purple paint the cover the entire page. Next I used a Hedi Swapp stencil and applied key lime Dylusions paint over the stencil.  The paint turned gold when it reacted with the purple.  I outlined the stenciled squares with white gel pen (on the right side of the page) and outlined Flossie and added her pearls with the gel pen. The chain was made by making small circles with the Penny colored Dina Wakely paint.  The Fleur de lys with made from scraps of paper using the Martha Stewart paper punch, after gluing them to the page, they were outlined with turquoise Dina Wakely paint.

Monday, May 4, 2015

Decorating With Paper and Vinyl


In the process of reorganizing my studio, I decided it's time to give it a "face lift" rather than a complete makeover.  The Jet Max white craft storage units store all of my art and craft supplies but the plain white cubes are beginning to look a little tired and drab.  They needed some decorative elements but painting was out of question.  Lately I have been experimenting with using vinyl in decorative projects around the house. I like the fact that vinyl can be removed or changed if I tire of it.  My printer and the storage cube are candidates for vinyl.  The desk top storage units will be papered and painted.

Decorated Printer
Decorated door to on storage cube.

The white storage units on my drafting table are functional but boring and not very inspiring.  I really like Graphic 45 Papers and wanted to use the paper from the Artisan collection in a decorative project.  I chose the peacock paper to cover the drawers on the desk top storage units and then painted the edges of the cubes with a mixture of Dylusions turqouise, Liquitex light blue and Liquitex white acrylic paints.  I added a few drops of Golden Acrylic Glazing Medium to make the paint flow.


Larger Storage Unit


Smaller Storage Unit and Washi Tape Storage.


 Directions For Decorating With Paper and Vinyl Projects:

Recollections Storage Cubes from Michaels
Hard Coat Mod Podge
Foam Brush
Graphic 45 Paper- I used Peacock from the Artisan Collection

Vinyl designed to be used in cutting machines- I used teal and bubblegum pink vinyl from My Vinyl Direct. They have a large selection of colors and sizes and offer a custom color pack where you can pick 12 (12x12) sheets of the colors of your choice.
Black vinyl- Left over Cricut vinyl from Michaels.  Both Cricut and My Vinyl Direct use vinyl manufactured by Orcal.

SVG Cutting Files- C'est la vie was from Snap Dragon Snippets and Carpe Diem from the Silhouette Design Store
Dylusions Turquoise acrylic paint
Liquitex White and Light Blue acrylic paint
Small Flat Paint Brush


1.  Cut the Carpe Diem out of teal vinyl, using the SVG cutting file dimensions (without resizing).  I placed a 12x12 sheet of vinyl on the cutting mat and taped the edges with Scotch Blue Painter's Tape to secure it.  Carefully weed the excess vinyl from the cutting mat.  Place the phrase on the front of the storage cube door and press in place.  Cut four corners from the vinyl left on the cutting mat and place the vinyl corner in each corner of the door, as accents.

2.  Cut the Eiffel Tower out of black vinyl, without resizing the original image.   Align the tower on the center of the printer and press in place to secure it.  Cut the heart and c'est la vie out of pink vinyl and align the phrase under the tower and the heart in the center of the tower.  Attach a small adhesive pink crystal to the top of the tower and adhesive pearls at the ends of the flourishes.

3.  Remove the drawer pulls from the desk top storage cubes and set aside.  Cut the 12x12 peacock paper in half.  Use Mod Podge to glue the paper to the drawer of the large storage cube.  Apply a coat of Mod Podge to the paper to coat it and set aside to dry.

4.  Cut the remaining half sheet of the peacock paper to fit the drawer of the small storage cube and the front panels of the washi tape storage cubes. Glue in place with Mod Podge and coat the top of the paper with Mod Podge and set aside to dry.