This time I decided to make the book completely my own from cover to cover. To do this I needed to invest in a punch and bind system. There are several systems available on the market. I ended up buying GBC's Pro Click system. I really like the Pro Click punch but the system does have it's pros and cons. The punch is light weight, stores easily, is easy to operate and punches smoothly and neatly. The cons: it punches only one sheet of heavy paper or card stock at a time (it jams with 2 pieces of heavy paper), it punches 8 1/2 x 11 inch paper (the oversize is about 1/4 inch more), and the Pro Click spines must be closed individually by hand. This system is good for craft use, binding a couple of books at one time but it's too tedious and time consuming to do more than that. For this project I also used the Purple Cows laminating machine to make the front and back covers for the book. This machine does both hot and cold laminating, accommodates several sizes of laminating pouches and will accept laminating pouches made by other manufacturers (not just Purple Cow).
This is a good way to preserve family recipes for the next generation. Both Michelle and Brittany really liked receiving a cookbook with their favorite recipes rather than a commercial cookbook.
 |
| Laminating the book cover. |
 |
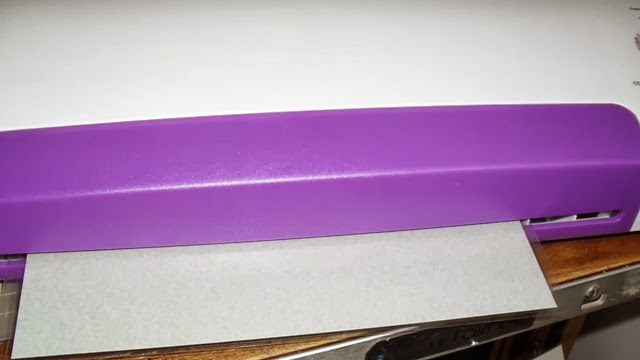
| Punching the pages. |
 |
| Front cover has been laminated and punched. |
 |
| Open Pro Click spine ready to bind pages. |
 |
| Snapping spine closed. |
 |
| Using Pro Click tool to close spine. |
 |
| Finished book. Clip Art from Micro Soft Office. |
 |
Inside pages of finished book. |
Laminating machine (optional)
Heavy white card stock (2 sheets)- for book cover
White paper-28 lb.-for printing book pages on two sides
Pro Click Punch (available at Office Depot)
Pro Click Spines
Laminating pouches- for front and back cover
Clip art
1. Type the book title and add clip art using Micro Soft Word. Print the cover on heavy card stock.
2. Put the front cover in a laminating pouch and run through the laminating machine. While the laminated page is still warm, trim the bottom of the page so that it fits in the Pro Click punch. Place the edge of the laminated cover against the back of the punch and move the roller slowly to punch the page. Moving the roller too quickly sometimes causes the page to slip and the punches to be off the page. Repeat the process with the back cover.
3. Type your family's favorite recipes into Micro Soft word. Add clip art and word art to add impact to the recipe pages. Print the recipes on the heavy white paper, using the two sided option on your printer. Type recipes section dividers like the Sweet Treats (picture above) and print on one side only. Punch the recipe pages and the section dividers with the Pro Click. The Pro Click will punch 2 sheets of 28 lb. paper without jamming but sometimes the bottom sheet of paper shifts during the punching, causing the punches to be off (requiring me to reprint the page). In the end it was faster to punch one sheet at a time than to go back and re-print mis-punched sheets. Arrange the book in it's finished order.
4. Open the Pro Click Spine and lay it flat on your work surface. Place the front cover face down on the left spines and the back cover on the right spines. Divide the book in half. Place the first half (front cover to the middle) on the left spine and the second half (middle to back cover) on the right spine. Once the pages a aligned on the spine, start closing each individual ring on the spine by hand. Once all of the rings are closed use the Pro Click Tool to make sure the spine is securely closed.