Snow, snow, snow! It seems like it snows almost every other day and like everyone else, I'm so tired of this weather. Fortunately our friends invited us to spend some time with them on Marco Island, Florida to escape the winter weather. My husband and I bundled up in our wool sweaters and coats and headed for the airport, hopped on a plane and left the winter behind. Marco Island was warm (82 degrees) and beautiful. Every where I went I was inspired by the beauty of the island- sunsets, beach and the animals. I ended up taking over 200 photos, some of which I intend to turn into paintings. I decided to share some of my favorite photos.
The marina is inhabited by a flock of Pelicans. While my husband and his friend were cleaning the fish they caught I decided to take some pictures of the marina. I was amazed that this Pelican let me get close to him to take this picture. I was only 6 inches away when I snapped the picture. This guy is the bird in the front on the bottom picture.
The marina was also home to a beautiful Snowy Egret. He was a little more shy than the Pelicans so I had to zoom in to snap this photo.
While walking on the beach, I was able to get fairly close to this group of Royal Terns.
The sunsets on the beach were so beautiful.
Our week in paradise has ended and we flew back to freezing weather and snow (of course) but as I look at these pictures I feel optimistic that I can endure these last few weeks of winter.
Bienvenu `a mon blog! Welcome to Madame Frog's Craft Blog! This site is devoted to crafts.
Thursday, February 27, 2014
Monday, February 17, 2014
Watercolor Ballet Dancer
Degas is one of my favorite impressionist artists. I love his paintings of Ballet Dancers. I was really happy to find of book of Degas Drawings of Dancers on Amazon. The book contains 41 pages of Degas' drawings-some are sketches or preparatory studies and some are finished drawings. Like many artists, I like to copy the works of the Masters in order to improve my drawing skills so this book was just what I was looking for. After helping my husband clear our driveway after the last snow bombardment (3 ft. this time)I shoveled a path to our mailbox so our mail carrier would have no trouble delivering my books. The book arrived on Saturday and by Saturday evening I had chosen my drawing-"Battements" on the Toes at the Barre. Since I usually draw animals the initial blocking in was a little awkward. I had no prior experience in drawing a person but found that once I got past the initial blocking in, the actual drawing got a lot easier.
Brittany has found that one of the perks of having a mother who is an artist is that she never has to buy art work unless she wants a particular piece. Having just moved into a new apartment she has been asking for paintings and prints to decorate her walls. She knows that I am only to happy to oblige and that I usually have finished works laying around my studio that I can frame and send off to her. This painting reminds me of Brittany when she studied ballet so this one is destined to be sent to her.
For this painting I used Masters Touch watercolors (available at Hobby Lobby) and Canson watercolor paper. I've tried other brands of watercolor paper including Strathmore but Canson is my favorite. I like the tooth of the paper, it tends to hold the color a little better than the other papers that I have tried. The Dancer's arms and legs were done with a preliminary wash of flesh; the dress is a wash of rose and white to make a light pink; the bow is rose plus the light pink mixture and the shoes are light pink mix and flesh to make a ballet pink. The dress is painted with a wash of light pink and blended out from the edges to the middle by loading a clean brush with water, then picking up the paint along the edges with the brush and painting toward the center.
Brittany has found that one of the perks of having a mother who is an artist is that she never has to buy art work unless she wants a particular piece. Having just moved into a new apartment she has been asking for paintings and prints to decorate her walls. She knows that I am only to happy to oblige and that I usually have finished works laying around my studio that I can frame and send off to her. This painting reminds me of Brittany when she studied ballet so this one is destined to be sent to her.
| Preparatory sketch. |
| Under painting in progress. |
Wednesday, January 8, 2014
Family Recipe Book
It's been so cold the past few days that I couldn't bring myself to venture out in the 7 degree weather. I decided to stay in and work on a recipe book for Brittany. The book is a collection of her favorite dishes that she grew up eating. I did a similar book for Michelle as a shower gift. Michelle's book was a commercially available spiral bound book to which the recipes could be added.
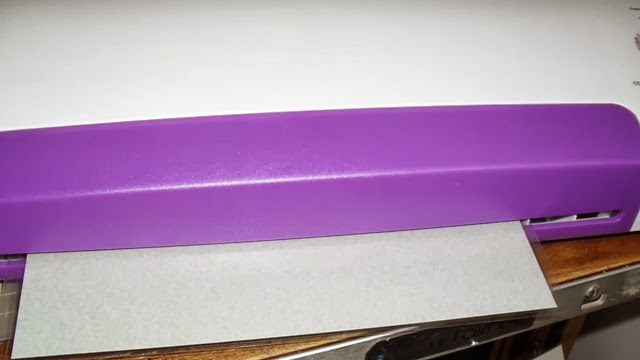
This time I decided to make the book completely my own from cover to cover. To do this I needed to invest in a punch and bind system. There are several systems available on the market. I ended up buying GBC's Pro Click system. I really like the Pro Click punch but the system does have it's pros and cons. The punch is light weight, stores easily, is easy to operate and punches smoothly and neatly. The cons: it punches only one sheet of heavy paper or card stock at a time (it jams with 2 pieces of heavy paper), it punches 8 1/2 x 11 inch paper (the oversize is about 1/4 inch more), and the Pro Click spines must be closed individually by hand. This system is good for craft use, binding a couple of books at one time but it's too tedious and time consuming to do more than that. For this project I also used the Purple Cows laminating machine to make the front and back covers for the book. This machine does both hot and cold laminating, accommodates several sizes of laminating pouches and will accept laminating pouches made by other manufacturers (not just Purple Cow).
This is a good way to preserve family recipes for the next generation. Both Michelle and Brittany really liked receiving a cookbook with their favorite recipes rather than a commercial cookbook.
Directions for Recipe Book:
Laminating machine (optional)
Heavy white card stock (2 sheets)- for book cover
White paper-28 lb.-for printing book pages on two sides
Pro Click Punch (available at Office Depot)
Pro Click Spines
Laminating pouches- for front and back cover
Clip art
1. Type the book title and add clip art using Micro Soft Word. Print the cover on heavy card stock.
2. Put the front cover in a laminating pouch and run through the laminating machine. While the laminated page is still warm, trim the bottom of the page so that it fits in the Pro Click punch. Place the edge of the laminated cover against the back of the punch and move the roller slowly to punch the page. Moving the roller too quickly sometimes causes the page to slip and the punches to be off the page. Repeat the process with the back cover.
3. Type your family's favorite recipes into Micro Soft word. Add clip art and word art to add impact to the recipe pages. Print the recipes on the heavy white paper, using the two sided option on your printer. Type recipes section dividers like the Sweet Treats (picture above) and print on one side only. Punch the recipe pages and the section dividers with the Pro Click. The Pro Click will punch 2 sheets of 28 lb. paper without jamming but sometimes the bottom sheet of paper shifts during the punching, causing the punches to be off (requiring me to reprint the page). In the end it was faster to punch one sheet at a time than to go back and re-print mis-punched sheets. Arrange the book in it's finished order.
4. Open the Pro Click Spine and lay it flat on your work surface. Place the front cover face down on the left spines and the back cover on the right spines. Divide the book in half. Place the first half (front cover to the middle) on the left spine and the second half (middle to back cover) on the right spine. Once the pages a aligned on the spine, start closing each individual ring on the spine by hand. Once all of the rings are closed use the Pro Click Tool to make sure the spine is securely closed.
This time I decided to make the book completely my own from cover to cover. To do this I needed to invest in a punch and bind system. There are several systems available on the market. I ended up buying GBC's Pro Click system. I really like the Pro Click punch but the system does have it's pros and cons. The punch is light weight, stores easily, is easy to operate and punches smoothly and neatly. The cons: it punches only one sheet of heavy paper or card stock at a time (it jams with 2 pieces of heavy paper), it punches 8 1/2 x 11 inch paper (the oversize is about 1/4 inch more), and the Pro Click spines must be closed individually by hand. This system is good for craft use, binding a couple of books at one time but it's too tedious and time consuming to do more than that. For this project I also used the Purple Cows laminating machine to make the front and back covers for the book. This machine does both hot and cold laminating, accommodates several sizes of laminating pouches and will accept laminating pouches made by other manufacturers (not just Purple Cow).
This is a good way to preserve family recipes for the next generation. Both Michelle and Brittany really liked receiving a cookbook with their favorite recipes rather than a commercial cookbook.
| Laminating the book cover. |
| Punching the pages. |
| Front cover has been laminated and punched. |
| Open Pro Click spine ready to bind pages. |
| Snapping spine closed. |
| Using Pro Click tool to close spine. |
| Finished book. Clip Art from Micro Soft Office. |
Inside pages of finished book. |
Laminating machine (optional)
Heavy white card stock (2 sheets)- for book cover
White paper-28 lb.-for printing book pages on two sides
Pro Click Punch (available at Office Depot)
Pro Click Spines
Laminating pouches- for front and back cover
Clip art
1. Type the book title and add clip art using Micro Soft Word. Print the cover on heavy card stock.
2. Put the front cover in a laminating pouch and run through the laminating machine. While the laminated page is still warm, trim the bottom of the page so that it fits in the Pro Click punch. Place the edge of the laminated cover against the back of the punch and move the roller slowly to punch the page. Moving the roller too quickly sometimes causes the page to slip and the punches to be off the page. Repeat the process with the back cover.
3. Type your family's favorite recipes into Micro Soft word. Add clip art and word art to add impact to the recipe pages. Print the recipes on the heavy white paper, using the two sided option on your printer. Type recipes section dividers like the Sweet Treats (picture above) and print on one side only. Punch the recipe pages and the section dividers with the Pro Click. The Pro Click will punch 2 sheets of 28 lb. paper without jamming but sometimes the bottom sheet of paper shifts during the punching, causing the punches to be off (requiring me to reprint the page). In the end it was faster to punch one sheet at a time than to go back and re-print mis-punched sheets. Arrange the book in it's finished order.
4. Open the Pro Click Spine and lay it flat on your work surface. Place the front cover face down on the left spines and the back cover on the right spines. Divide the book in half. Place the first half (front cover to the middle) on the left spine and the second half (middle to back cover) on the right spine. Once the pages a aligned on the spine, start closing each individual ring on the spine by hand. Once all of the rings are closed use the Pro Click Tool to make sure the spine is securely closed.
Thursday, January 2, 2014
Knitting With Mink
On a recent trip to a yarn shop in Rockville, Maryland I found the most beautiful jewel colored yarn hanging from the display rack. I was immediately drawn to the deep amethyst and removed a hank from the rack. The yarn was incredibly soft and 100% mink, rivaling cashmere. The hank had good yardage (300 meters) and was priced about the same as Merino wool. The purpose of the visit to this yarn shop was to buy wool as a gift for Brittany and possibly some sock yarn for myself, not to buy luxury yarn. The yarn was so soft and beautiful that I couldn't put it back on the rack. I knew I would later regret not buying it, especially since I have always ascribed to the French principle that "luxury in one's life is a requirement".
The yarn when knit is very soft and drapey. After knitting several swatches the yarn seemed to work best with a sturdy knit/purl combination pattern. I chose the Little Boxes pattern from The Knit Stitch Pattern Handbook by Melissa Leapman. Also the soft, drapey quality of the yarn made it a good choice for a scarf.
Mink yarn is produced from the soft under coat of the Mink. The animals are brushed to obtain the fur which is then spun into yarn. When the Mink starts to shed it's under coat the animal is brushed to remove the excess fur. Sort of like brushing the family dog. Mink, unlike dogs, are not pleasant animals so I pity the poor person that has to brush them. The fact that someone was willing to brush these nasty animals to produce yarn makes me appreciate the luxury all that much more.
Directions for Mink Scarf:
The Knit Stitch Pattern Handbook-An Essential Collection of 300 Designer Stitches & Techniques by Melissa Leapman: Little Boxes pattern
Lotus Yarns Mimi-100 % Mink Yarn Color # 18;one hank (300 meters)
Size 3 Knitting Needles- I am using Knit Picks Karbonz Interchangeable needles
Cast on 41 sts (39 sts plus 2 sts) using the long tail cast on. Knit according to patterns directions. Since I am designing the scarf and have no previous experience with the yarn I don't know the final length of the scarf.
The yarn when knit is very soft and drapey. After knitting several swatches the yarn seemed to work best with a sturdy knit/purl combination pattern. I chose the Little Boxes pattern from The Knit Stitch Pattern Handbook by Melissa Leapman. Also the soft, drapey quality of the yarn made it a good choice for a scarf.
| The yarn is a deep, rich purple. I lightened the photo to show the stitch detail. |
Mink yarn is produced from the soft under coat of the Mink. The animals are brushed to obtain the fur which is then spun into yarn. When the Mink starts to shed it's under coat the animal is brushed to remove the excess fur. Sort of like brushing the family dog. Mink, unlike dogs, are not pleasant animals so I pity the poor person that has to brush them. The fact that someone was willing to brush these nasty animals to produce yarn makes me appreciate the luxury all that much more.
Directions for Mink Scarf:
The Knit Stitch Pattern Handbook-An Essential Collection of 300 Designer Stitches & Techniques by Melissa Leapman: Little Boxes pattern
Lotus Yarns Mimi-100 % Mink Yarn Color # 18;one hank (300 meters)
Size 3 Knitting Needles- I am using Knit Picks Karbonz Interchangeable needles
Cast on 41 sts (39 sts plus 2 sts) using the long tail cast on. Knit according to patterns directions. Since I am designing the scarf and have no previous experience with the yarn I don't know the final length of the scarf.
Wednesday, January 1, 2014
Tracery Vest
It's New Year's Day and the holidays are officially over and we have about two more months of cold, wintry weather left before Spring. Now that I am finished with all of the decorating, wrapping packages and baking for Christmas, it's the perfect time to indulge in some of the knitting projects that I had planned. For the last two weeks I have been working on the Tracery Vest from the Unofficial Harry Potter Knits magazine. Even though I am probably the only person on the planet that has never read a Harry Potter novel, I still really like the designs in the magazine. While the designs are based on characters and places in the Harry Potter books they are suitable for every day wear. The Tracery Vest is based on Gothic architecture with stained glass windows making it a perfect project for me to knit.
The vest is knit in the round and the directions and chart are clear and easy to follow. I deviated from the written directions slightly. The directions call for placing markers and increasing four stitches with the main color (black) after the markers, every other round 9 more times and incorporating the increased stitches into the pattern. The sections after the markers had more stitches between the design than the other segments. Every thing worked out fine until I started to knit the segment with the round windows, then suddenly the chart became very confusing to follow. I ripped the work back to the solid main color segment before the beginning of the lower row of windows and increased the appropriate number of stitches evenly around the needle. This didn't make a big difference in the look of the vest but made it much easier for me to follow the chart. I am posting the work so far. The vest measures 9 inches from the cast on edge and it's time to divide the stitches for the front and back and start knitting the decreases for the armholes.
After the Harry Potter Knits came out Plymouth Happy Feet yarn color #27 was difficult to find. After searching for quite a while I found it on Amazon. Several other on line retailers now carry the yarn (Jimmy Beans Wool, Annie's Catalog and Yarn Barn).
Plymouth Happy Feet like many other yarns available on the market comes in hanks rather than skeins. Most yarn stores have a yarn swift and a ball winder are happy to wind the yarn into a ball for their customers. Since I ordered the yarn on line it was shipped to me in hanks. Winding the yarn from the hank into a ball (by hand) takes about 30 minutes provided it doesn't tangle or knot, then it could take 2 hours or more depending on how badly the yarn is tangled. Until recently I used my kitchen chairs to wind the yarn. The chairs have decorative spindles that extend beyond the top of the chair. I untwist the hank of yarn and loop one end over the end of one chair spindle and do the same with the chair next to it. Then I gently push the chairs (with yarn attached) apart until the yarn is taut, cut the waste yarn holding the hank together and start winding into a ball. This year my husband gave me a yarn swift and ball winder for Christmas. I really like the fact that the swift is collapsible so it can stored away when not in use. The swift and ball winder make winding the yarn easier and quicker-about 10 minutes total.
The vest is knit in the round and the directions and chart are clear and easy to follow. I deviated from the written directions slightly. The directions call for placing markers and increasing four stitches with the main color (black) after the markers, every other round 9 more times and incorporating the increased stitches into the pattern. The sections after the markers had more stitches between the design than the other segments. Every thing worked out fine until I started to knit the segment with the round windows, then suddenly the chart became very confusing to follow. I ripped the work back to the solid main color segment before the beginning of the lower row of windows and increased the appropriate number of stitches evenly around the needle. This didn't make a big difference in the look of the vest but made it much easier for me to follow the chart. I am posting the work so far. The vest measures 9 inches from the cast on edge and it's time to divide the stitches for the front and back and start knitting the decreases for the armholes.
| Tracery Vest |
After the Harry Potter Knits came out Plymouth Happy Feet yarn color #27 was difficult to find. After searching for quite a while I found it on Amazon. Several other on line retailers now carry the yarn (Jimmy Beans Wool, Annie's Catalog and Yarn Barn).
Plymouth Happy Feet like many other yarns available on the market comes in hanks rather than skeins. Most yarn stores have a yarn swift and a ball winder are happy to wind the yarn into a ball for their customers. Since I ordered the yarn on line it was shipped to me in hanks. Winding the yarn from the hank into a ball (by hand) takes about 30 minutes provided it doesn't tangle or knot, then it could take 2 hours or more depending on how badly the yarn is tangled. Until recently I used my kitchen chairs to wind the yarn. The chairs have decorative spindles that extend beyond the top of the chair. I untwist the hank of yarn and loop one end over the end of one chair spindle and do the same with the chair next to it. Then I gently push the chairs (with yarn attached) apart until the yarn is taut, cut the waste yarn holding the hank together and start winding into a ball. This year my husband gave me a yarn swift and ball winder for Christmas. I really like the fact that the swift is collapsible so it can stored away when not in use. The swift and ball winder make winding the yarn easier and quicker-about 10 minutes total.
Sunday, December 29, 2013
Work In Progress
The new year is quickly approaching and the stores are stocking products to help us get organized. Michaels is having a craft storage and organization sale, with up to 50% off, in January. This is good news for me because I need three more Jet Max storage cubes for my studio. During the Christmas crafting I had several projects going at one time and now my studio is in disarray. As I was cleaning up the aftermath of "hurricane Suzanne" I found a pastel painting that I was working on.
All major artists learned by copying from the masters-Van Gogh copied the great Delacroix. While Van Gogh is by far my favorite artist, it's important to learn from other artists. Picasso is a little too avante garde for me but I do really like some of his paintings. Picasso appeared to be one of the easier artists to copy because of the angular lines in his work. While it appeared at first glance to be easy, it was actually challenging because I am used to drawing with flowing, curved lines not short angular lines. Any way here is the work in progress. The picture is not close to being finished- it still needs more shading and the definition of facial features.
Saturday, December 28, 2013
French Manor Thank You Card
I hope that everyone had a happy holiday and a Merry Christmas. I would like to wish everyone a happy New Year.
Finally, the last of the packages has been shipped off to Brittany. Thank you to both the US Postal Service and UPS for getting all of the packages to Connecticut in time for Christmas. This was truly amazing given volume of packages that they handle and the fact that I was still shipping through both carriers the week before Christmas.
Now that Christmas is over it's time to make Thank You cards for all of the nice gifts that we received. I was inspired by a picture that I had seen recently. The picture featured a stone house with a window that had flowers in a window box. The picture was rustic, charming and definitely French (from Provence). When I saw the window image on the Cricut French Manor cartridge I immediately thought of this picture. This is not the usual Cricut cut and embellish card. This is a very labor intensive card because it employs a lot of different techniques. The entire card is covered with ivory tulle, the wall behind the window is embossed, distressed and painted, the window is covered with modeling paste then distressed and painted with walnut ink and finally the rose leaves are quilled. This card takes about two hours to make.
Craft Tips: After using all of the foam dots on a sheet, save the left over sheet. The foam around the dots can be cut into squares or small pieces and used like the dots to adhere embellishments. Ceramic tiles have many uses in a craft room. They are inexpensive and can be purchased in a variety of sizes at Home Depot or Loewes. Look for smooth glazed tiles. The tiles can be used to rest glue guns, or to mix acrylic or water color paints. Nothing sticks to the surface of the tile and they can be cleaned easily with soap and water.
Directions for French Manor Thank You Card:
Recollections Trader Jane Paper Pad- Tan mosaic patterned paper
DCWV Black Currant Stack- Pink and burgundy dotted paper
Goose Bumpz Lattice/Trellis embossing folder
White, ivory, aqua and black card stock
Caramel colored sheer ribbon
Pink dotted ribbon
Ranger Walnut Distress Ink
Distressing Tool
Pearl Modeling Paste
Recollections Small Crystal Heart
Recollections Small Antique Brads- two
Vellum
Ivory Tulle ribbon-available in the wedding section at Michaels
Prima Small Roses- blue, purple, ivory, orange and pink
Quilling Tool
Dark green, light green and olive green 1/4 inch quilling strips
Awl
Foam Dots
Stickles-Platinum Stickles glitter glue
Sizzix or Cuttlebug embossing machine
1. Using the Cricut French Manor cartridge cut the window out of ivory card stock at 4 1/2 inches. Cut the window wood work out of aqua card stock. Assemble the window. Cut a scrap of vellum to fit behind the window panes.
2. Apply the pearl modeling paste to the window frame using a palette knife. Try to make the modeling paste look like stucco. Let it dry.
3. Make four small quilled leaves using the quilling tool and a 6 inch strip of 1/4 wide dark green quilling paper. Remove the roll from the quilling tool and let it relax and unroll slightly, pinch the roll into a marquise shape and put a dot of glue of the loose end of the strip to secure it. Repeat the process making 5 olive leaves and 2 light green leaves.
4. Once the window is dry to the touch, use a distressing tool with a sanding tip to distress the window frame and the blue wood work. Be careful not to take off too much modeling paste or card stock.
5. Cut the tan mosaic paper approximately 5 1/8 inches high by 3 1/2 inches wide. Emboss the mosaic paper using the trellis embossing folder. Lightly distress the paper.
6. Cut the pink dotted paper approximately 6 inches high by 4 inches wide. Glue the tan paper on top of the pink paper leaving about 1/4 inch borders. Cut the black card stock 1/4 inch larger on all sides than the pink paper. Apply foam dots to the back of the pink paper and attach to the black card stock.
7. Spray a small amount of walnut distress ink onto a ceramic tile. Use a small flat paint brush to paint the distress ink over the embossed mosaic paper. Lightly apply the ink, you can always add more. Next, apply the distress ink to the window frame and the wood work. You want to have a weathered look. Add a small antiqued brad to the sides of the window frame. Apply foam dots to the back of the window (do not apply dots to the vellum or it will show through). Center the window on the mosaic paper and press in place.
8. Glue the quilled leaves around the left edge and bottom of the window. Glue the roses over the leaves.
9. Fold an 8 1/2 by 11 inch piece of white card stock in half to make a half-fold card. Cut a piece of ivory tulle ribbon 1/2 inch longer than the card. Cover the front of the card with the tulle and tuck the ends under the front edges of the card and glue in place. Cut the caramel colored ribbon 1/2 inch longer than the card, center the ribbon on the card lengthwise and glue in place. Tie a small bow and glue over the ribbon. Cut the pink dotted ribbon 1/2 inch longer than the length of the card and glue along the right edge of the card, tucking under the ends of the ribbon.
10. Attach a small pink crystal heart to the window transom and apply Stickles around the edges of the transom window.
Finally, the last of the packages has been shipped off to Brittany. Thank you to both the US Postal Service and UPS for getting all of the packages to Connecticut in time for Christmas. This was truly amazing given volume of packages that they handle and the fact that I was still shipping through both carriers the week before Christmas.
Now that Christmas is over it's time to make Thank You cards for all of the nice gifts that we received. I was inspired by a picture that I had seen recently. The picture featured a stone house with a window that had flowers in a window box. The picture was rustic, charming and definitely French (from Provence). When I saw the window image on the Cricut French Manor cartridge I immediately thought of this picture. This is not the usual Cricut cut and embellish card. This is a very labor intensive card because it employs a lot of different techniques. The entire card is covered with ivory tulle, the wall behind the window is embossed, distressed and painted, the window is covered with modeling paste then distressed and painted with walnut ink and finally the rose leaves are quilled. This card takes about two hours to make.
![]() |
| French Manor Card |
| Close-up of window. Vellum backing for window. |
Craft Tips: After using all of the foam dots on a sheet, save the left over sheet. The foam around the dots can be cut into squares or small pieces and used like the dots to adhere embellishments. Ceramic tiles have many uses in a craft room. They are inexpensive and can be purchased in a variety of sizes at Home Depot or Loewes. Look for smooth glazed tiles. The tiles can be used to rest glue guns, or to mix acrylic or water color paints. Nothing sticks to the surface of the tile and they can be cleaned easily with soap and water.
Directions for French Manor Thank You Card:
Recollections Trader Jane Paper Pad- Tan mosaic patterned paper
DCWV Black Currant Stack- Pink and burgundy dotted paper
Goose Bumpz Lattice/Trellis embossing folder
White, ivory, aqua and black card stock
Caramel colored sheer ribbon
Pink dotted ribbon
Ranger Walnut Distress Ink
Distressing Tool
Pearl Modeling Paste
Recollections Small Crystal Heart
Recollections Small Antique Brads- two
Vellum
Ivory Tulle ribbon-available in the wedding section at Michaels
Prima Small Roses- blue, purple, ivory, orange and pink
Quilling Tool
Dark green, light green and olive green 1/4 inch quilling strips
Awl
Foam Dots
Stickles-Platinum Stickles glitter glue
Sizzix or Cuttlebug embossing machine
1. Using the Cricut French Manor cartridge cut the window out of ivory card stock at 4 1/2 inches. Cut the window wood work out of aqua card stock. Assemble the window. Cut a scrap of vellum to fit behind the window panes.
2. Apply the pearl modeling paste to the window frame using a palette knife. Try to make the modeling paste look like stucco. Let it dry.
3. Make four small quilled leaves using the quilling tool and a 6 inch strip of 1/4 wide dark green quilling paper. Remove the roll from the quilling tool and let it relax and unroll slightly, pinch the roll into a marquise shape and put a dot of glue of the loose end of the strip to secure it. Repeat the process making 5 olive leaves and 2 light green leaves.
4. Once the window is dry to the touch, use a distressing tool with a sanding tip to distress the window frame and the blue wood work. Be careful not to take off too much modeling paste or card stock.
5. Cut the tan mosaic paper approximately 5 1/8 inches high by 3 1/2 inches wide. Emboss the mosaic paper using the trellis embossing folder. Lightly distress the paper.
6. Cut the pink dotted paper approximately 6 inches high by 4 inches wide. Glue the tan paper on top of the pink paper leaving about 1/4 inch borders. Cut the black card stock 1/4 inch larger on all sides than the pink paper. Apply foam dots to the back of the pink paper and attach to the black card stock.
7. Spray a small amount of walnut distress ink onto a ceramic tile. Use a small flat paint brush to paint the distress ink over the embossed mosaic paper. Lightly apply the ink, you can always add more. Next, apply the distress ink to the window frame and the wood work. You want to have a weathered look. Add a small antiqued brad to the sides of the window frame. Apply foam dots to the back of the window (do not apply dots to the vellum or it will show through). Center the window on the mosaic paper and press in place.
8. Glue the quilled leaves around the left edge and bottom of the window. Glue the roses over the leaves.
9. Fold an 8 1/2 by 11 inch piece of white card stock in half to make a half-fold card. Cut a piece of ivory tulle ribbon 1/2 inch longer than the card. Cover the front of the card with the tulle and tuck the ends under the front edges of the card and glue in place. Cut the caramel colored ribbon 1/2 inch longer than the card, center the ribbon on the card lengthwise and glue in place. Tie a small bow and glue over the ribbon. Cut the pink dotted ribbon 1/2 inch longer than the length of the card and glue along the right edge of the card, tucking under the ends of the ribbon.
10. Attach a small pink crystal heart to the window transom and apply Stickles around the edges of the transom window.
Subscribe to:
Posts (Atom)